3 Different Ways to Make Wooden Earrings
Tools Used:
Hand Saw: https://geni.us/PullSaw
Screw Clamp: https://geni.us/WjzGm8
Center Punch: https://geni.us/CenterPunch
2” Hole Saw: https://geni.us/NmBgfW
1” Forstner Bit: https://geni.us/s1ty
Scroll Saw: https://geni.us/jL2XSr
Laser Engraver: https://geni.us/2CzYHo0
Jewelry Pliers: https://geni.us/orwPN
Materials:
Frog Tap Yellow: https://geni.us/ahcu7E
Double Sided Tape: https://geni.us/mROEdYB
Thin Plywood: https://geni.us/3rwXu
Thin Walnut: https://geni.us/spiOecK
Silver Earring Hooks: https://geni.us/Bmmwq
Silver Wire: https://geni.us/SAV5lD
Earing Making Set: https://geni.us/1lF5F8A
Shellac: https://geni.us/zayGK
Intro
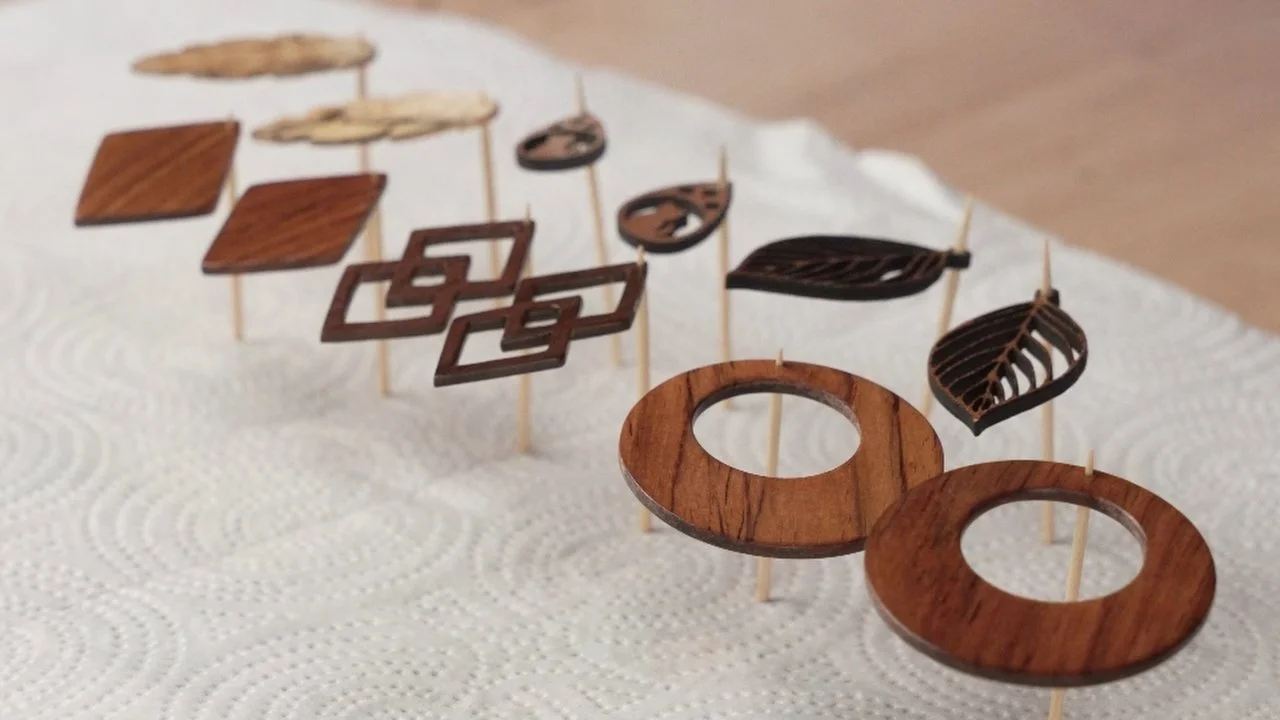
Making wooden jewelry is a great project because it doesn't take much material if you're buying it, and you might even be able to save a poor small piece of wood from the burn pile. Earrings are the focus of this article and I am going to cover three different methods and tool sets for making them. First we will look at using basic wood working tools, then go a little more advanced with a scroll saw (or coping saw), and then finish up with what a laser can produce.
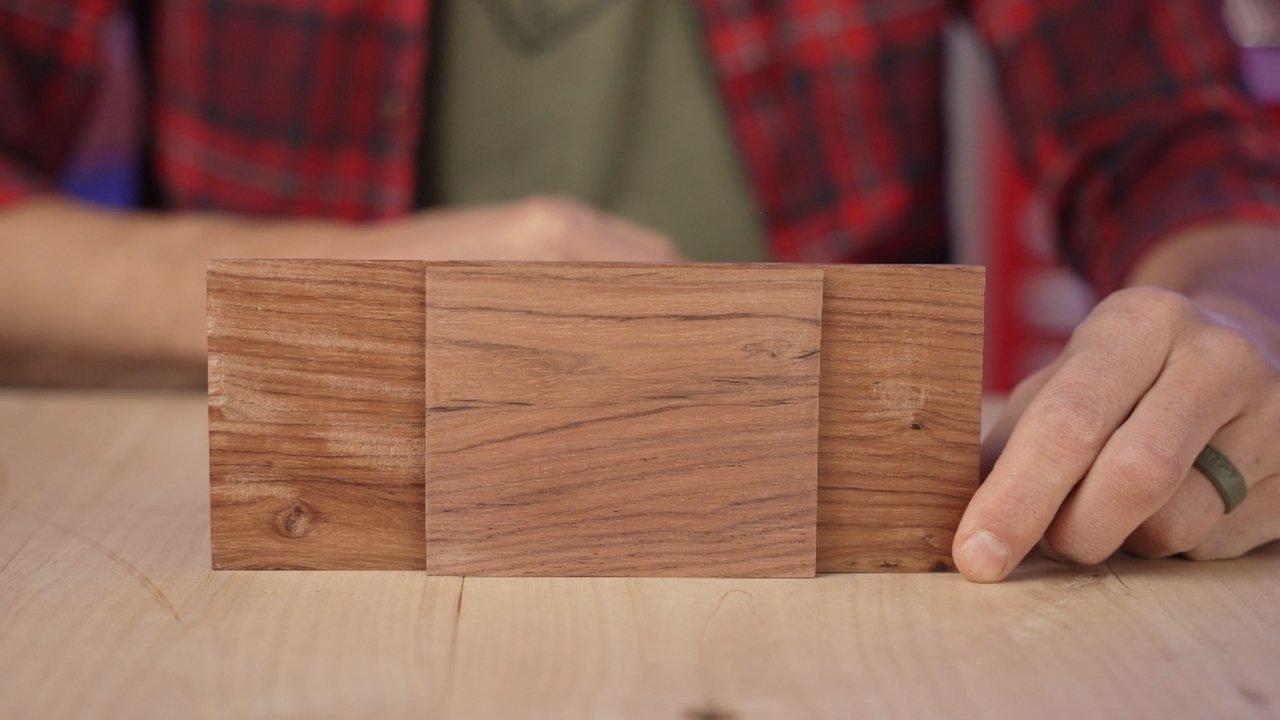
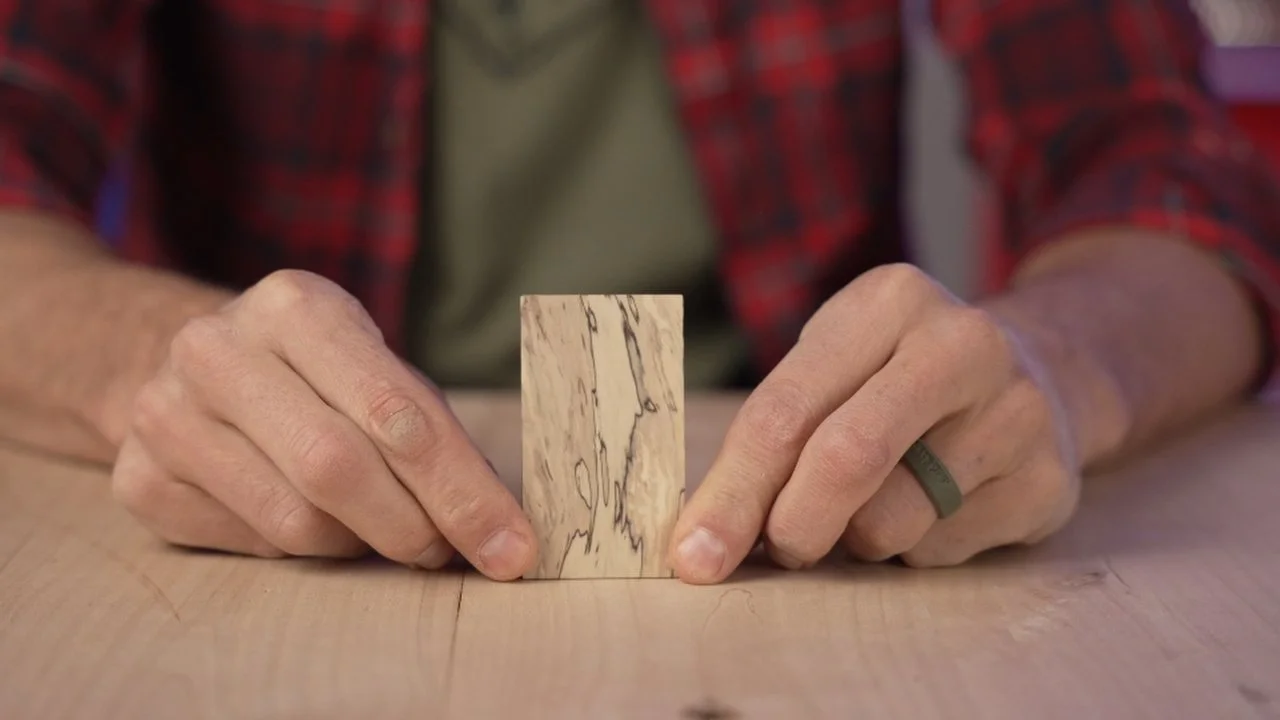
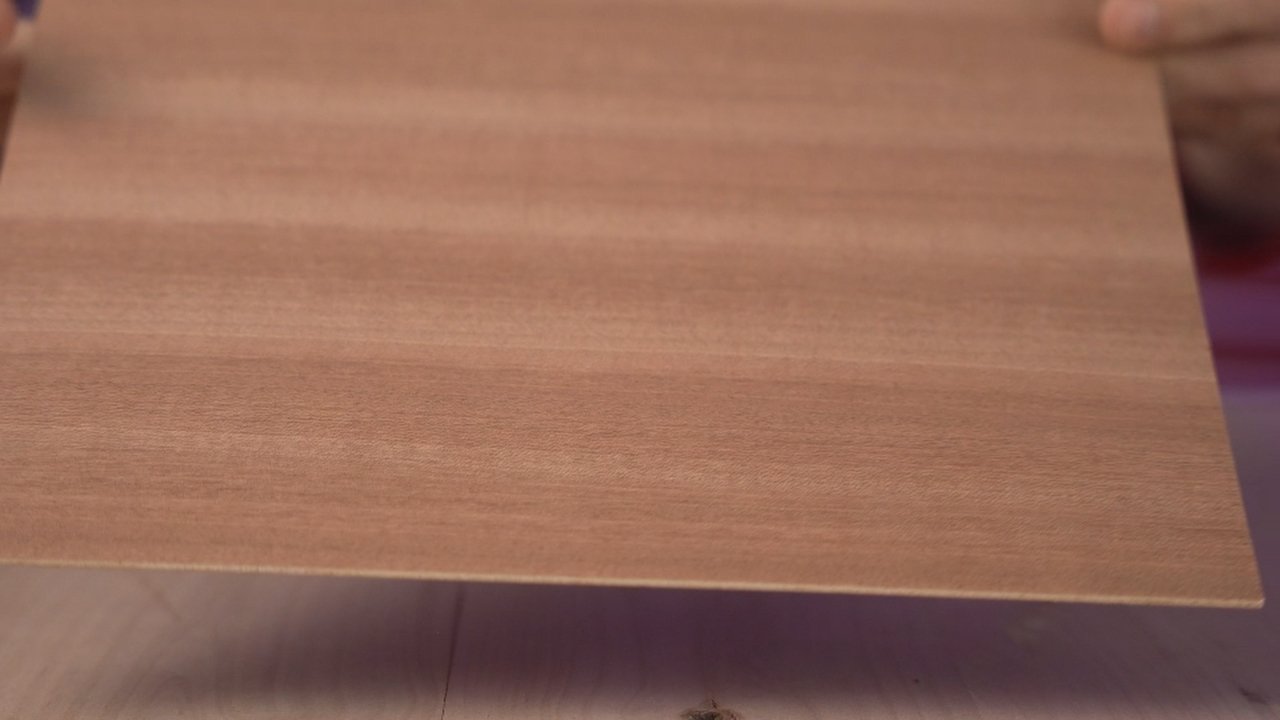
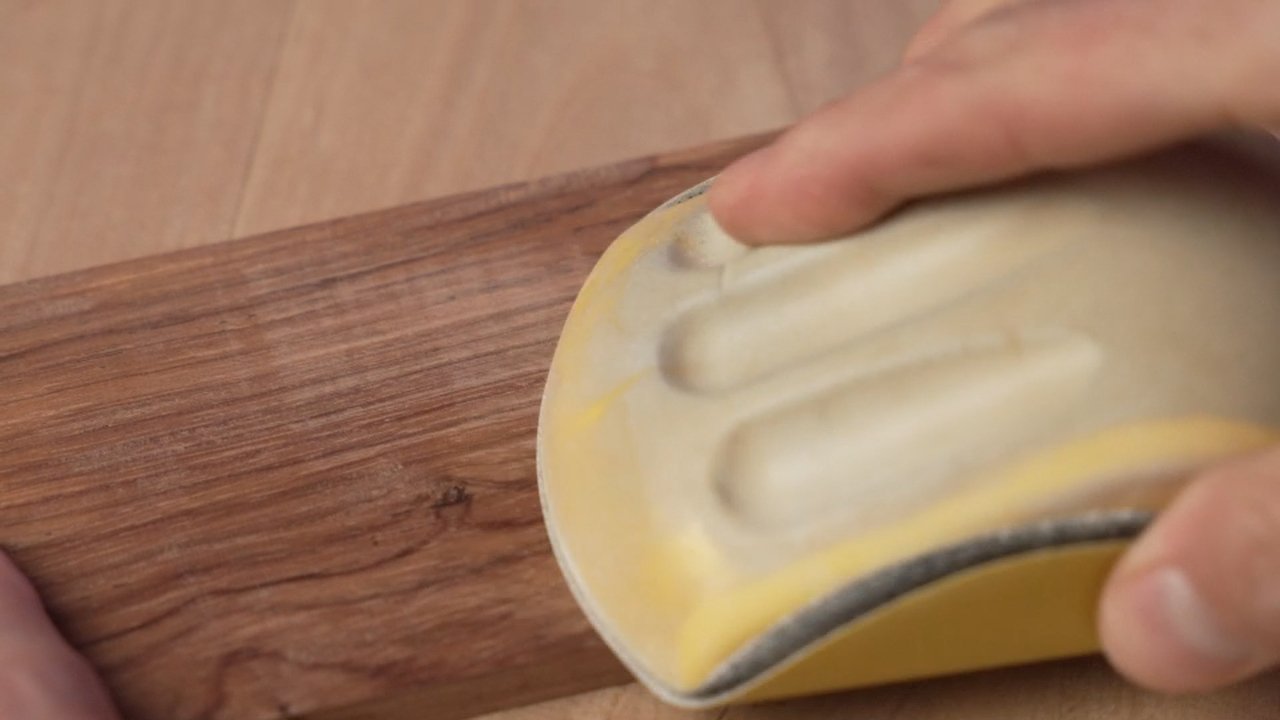
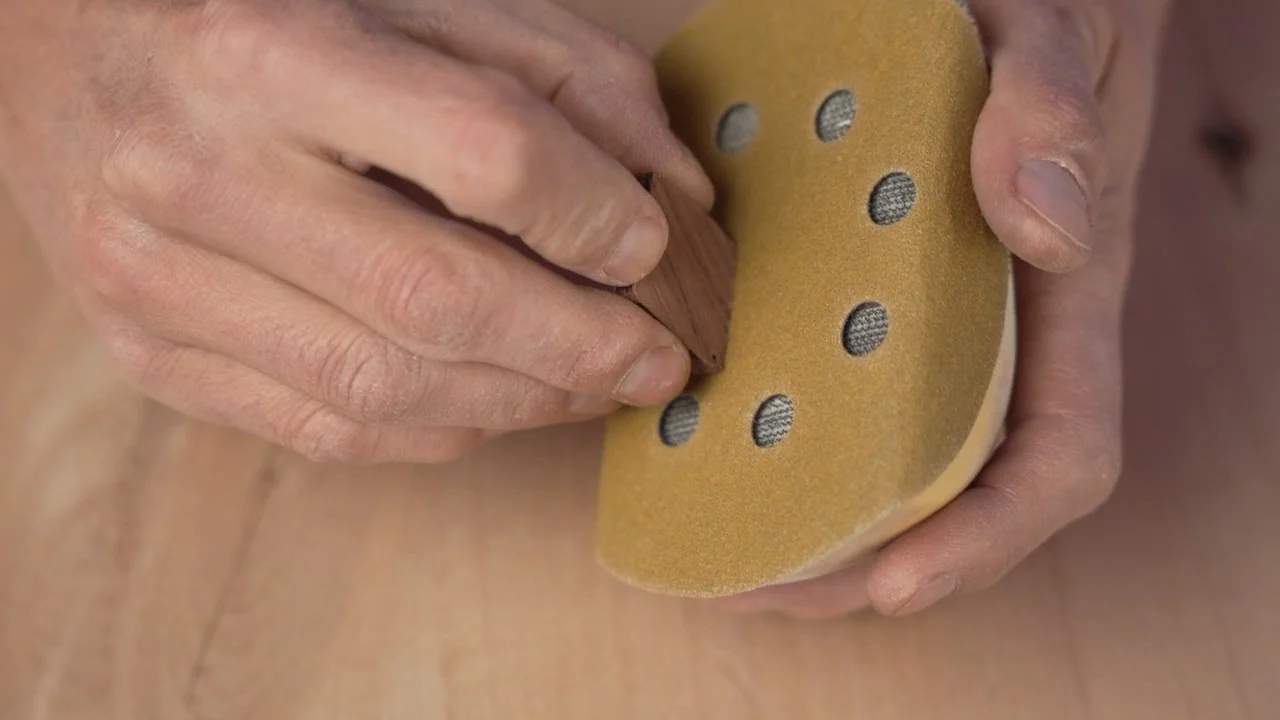
I have a couple of different materials that I used for this particular project, like an off cut of Walnut from a table I made for my sister, a little bit of rosewood from my first ever exotic wood purchase, and a little piece of spalted maple that came from a palette that I found. I also have some X tool brand plywood. I’m not sponsored by them, but I do really like the quality and variety of their products. All of these have either been milled to or purchased at three millimeters or 1 eighth of an inch thick. I think that’s a nice thickness for earrings because it's enough heft that they dangle nicely, but not so much that it seems to weigh on the ears. Before you start doing any cutting, I really do recommend pre-sending your material. I like to go all the way up to 220 grit. This work up front will help ensure that you're not breaking pieces apart with heavy sanding at the end.


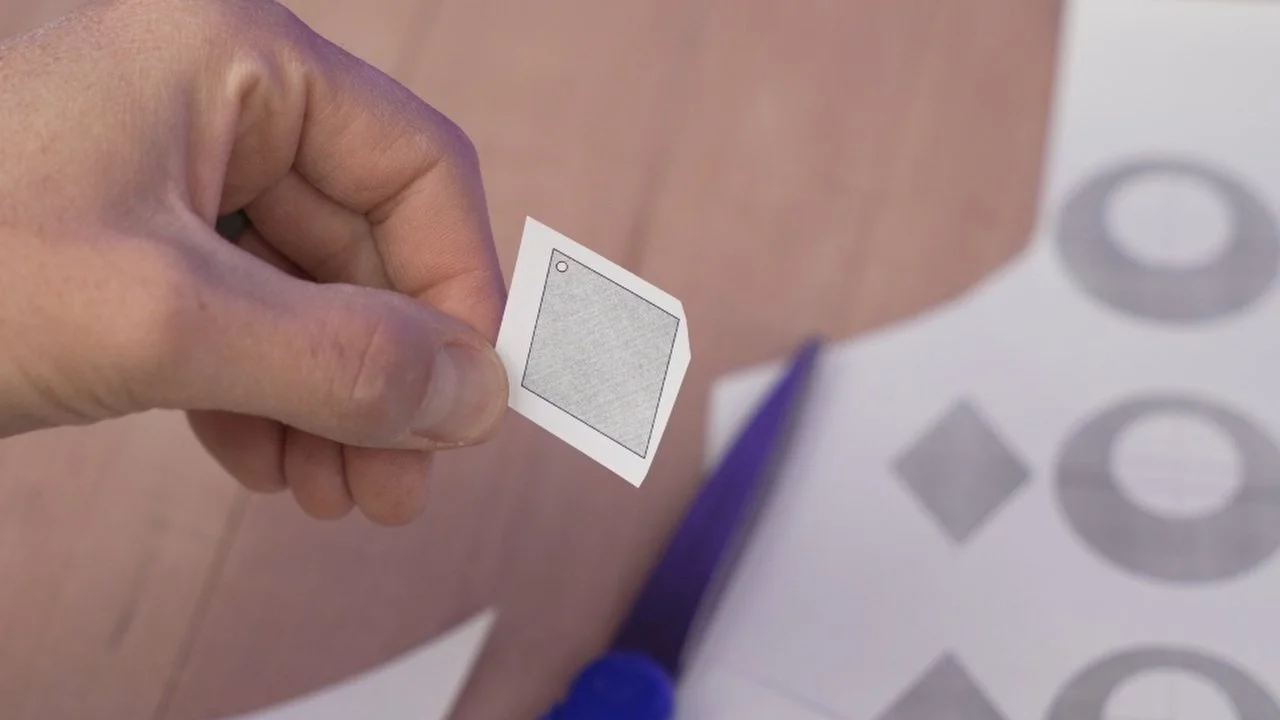
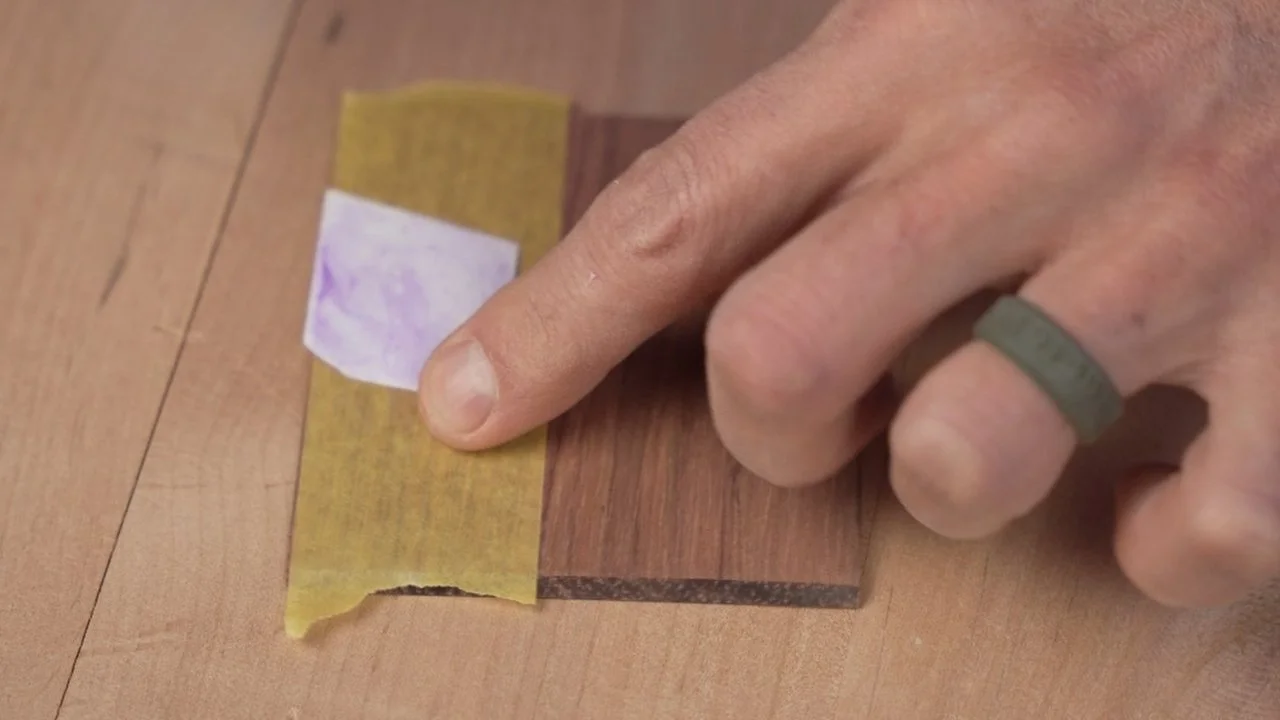
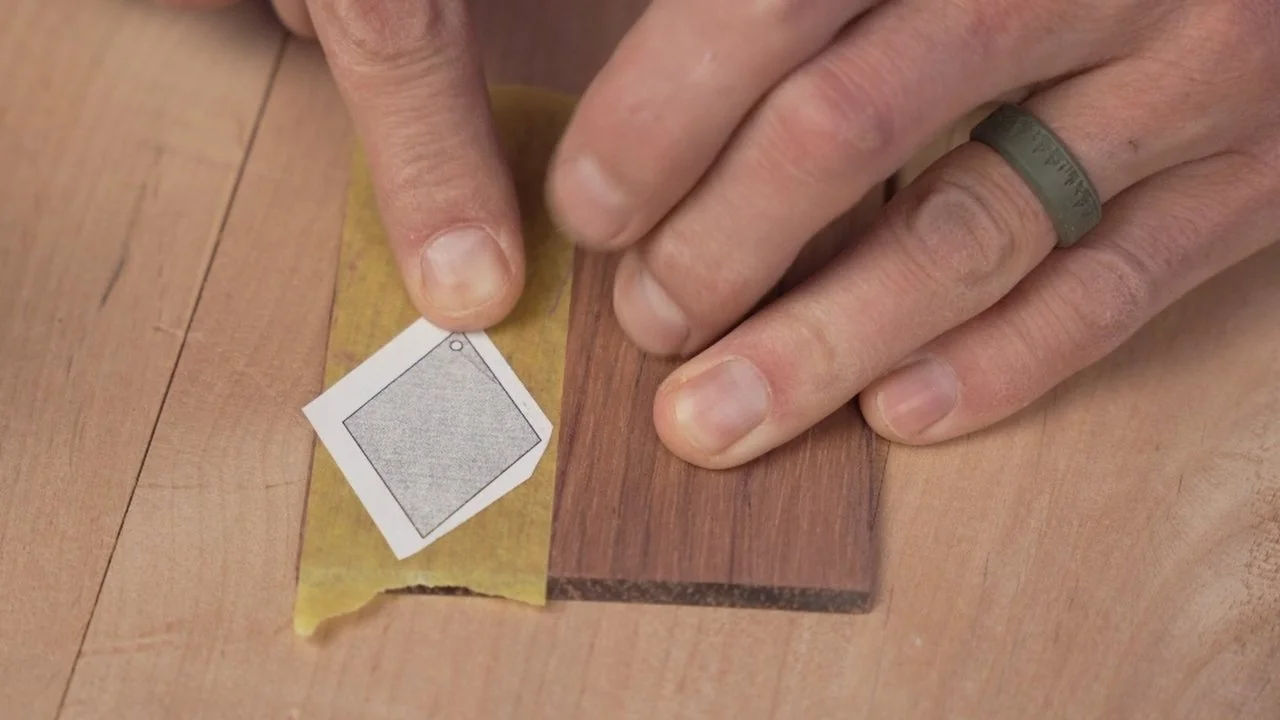
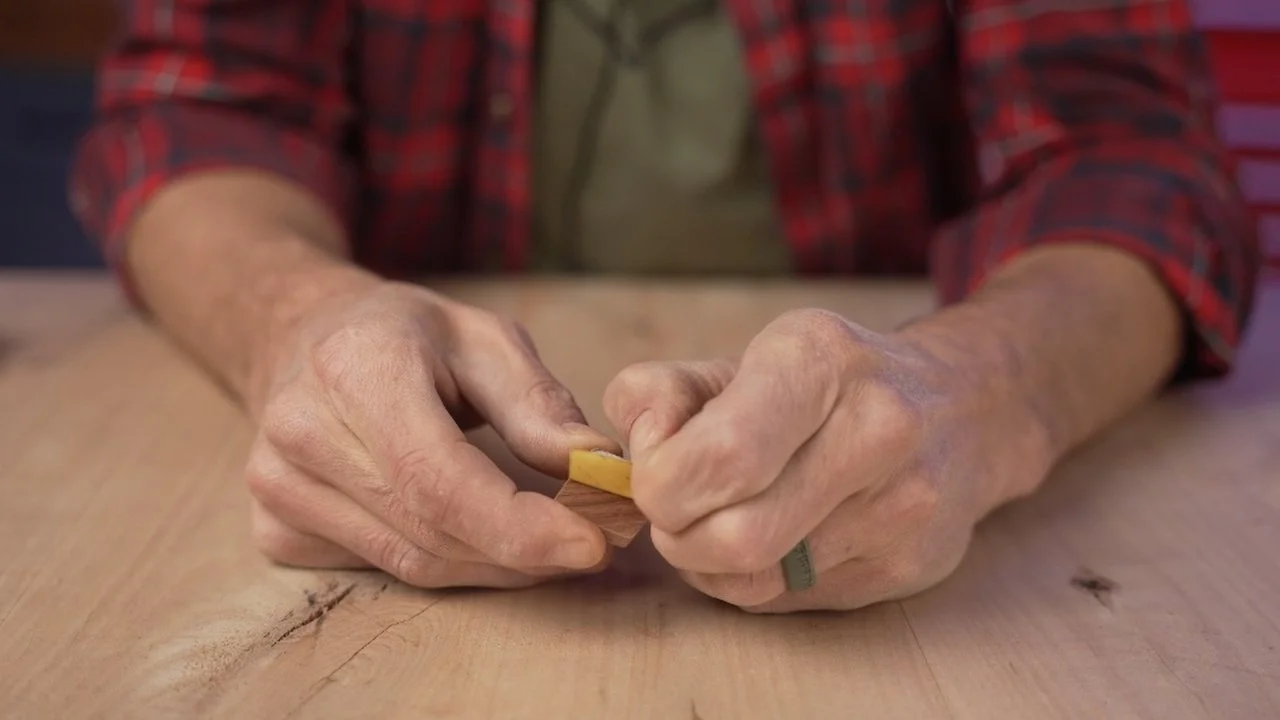
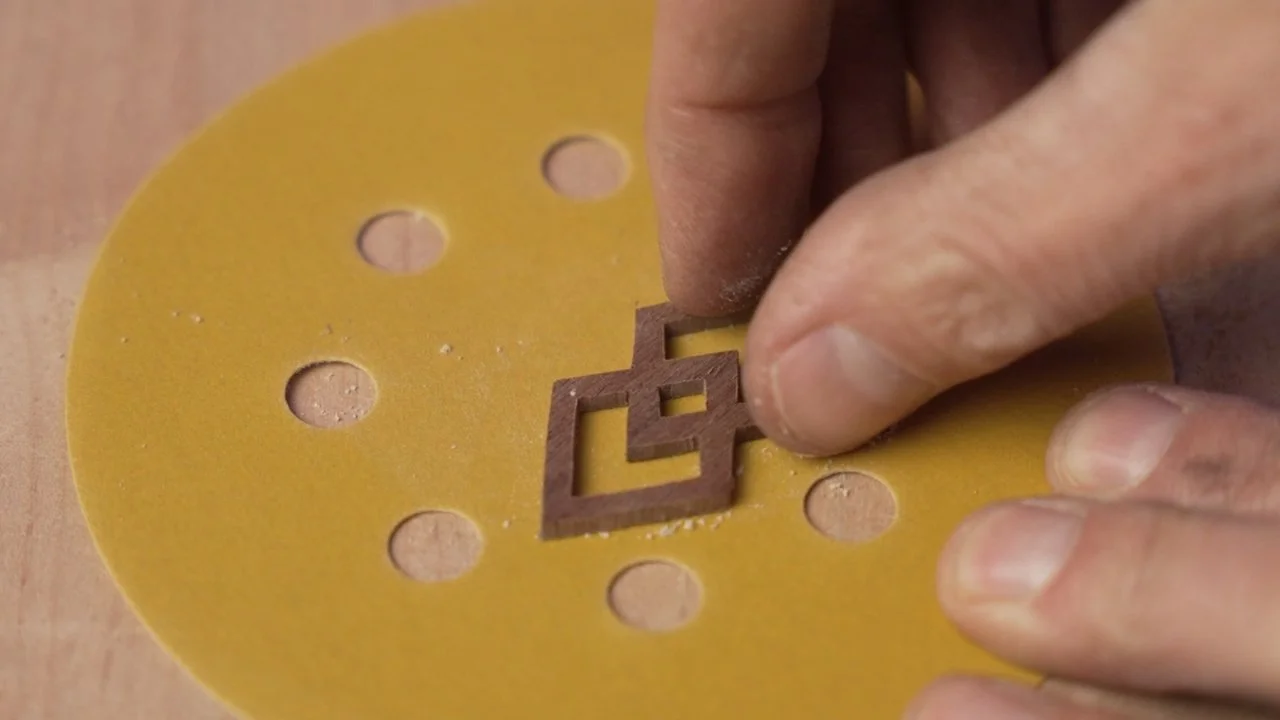
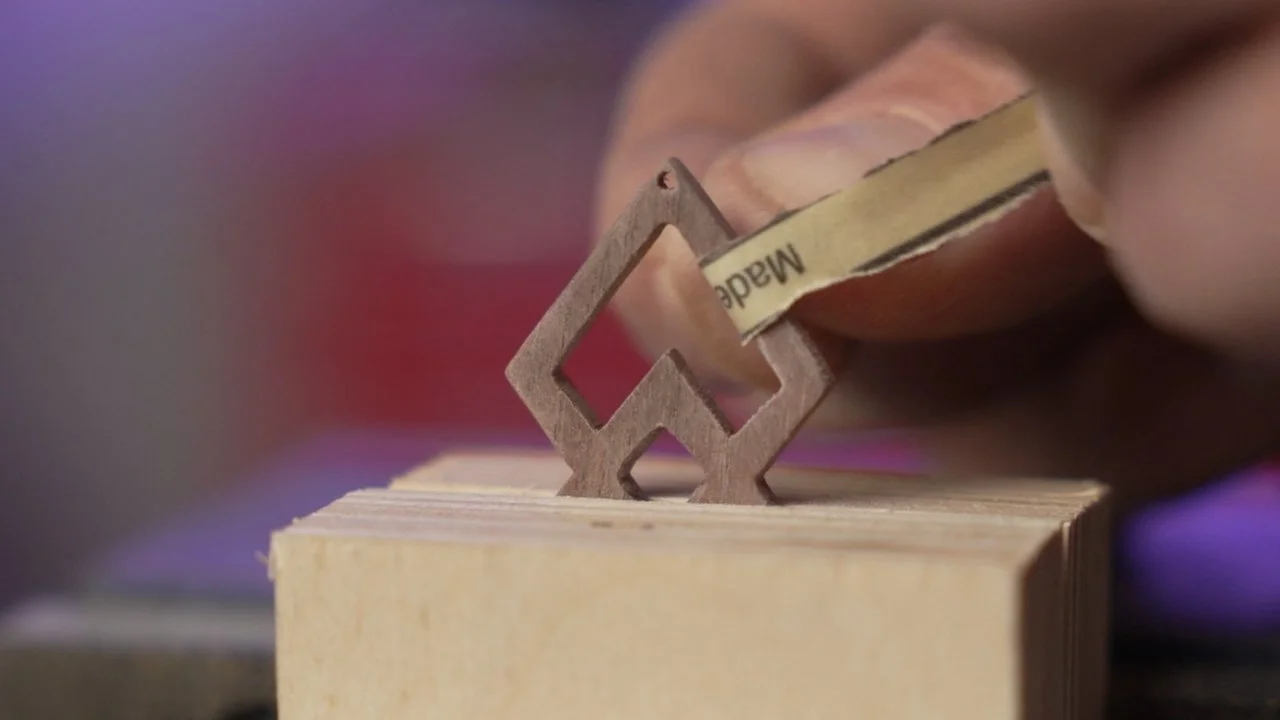
To prep the material I have a couple of tricks to make the whole processes go a bit smoother. First, I like to use some frog tape on the face of the wood. This makes it easier to pull the template off later and just generally keeps your piece cleaner. I created a template with a variety of designs, from basic geometric shapes, to some much more intricate patterns. The great thing about this kind of project is that you can really be creative and make something unique. For the first pair, I started with a simple diamond.
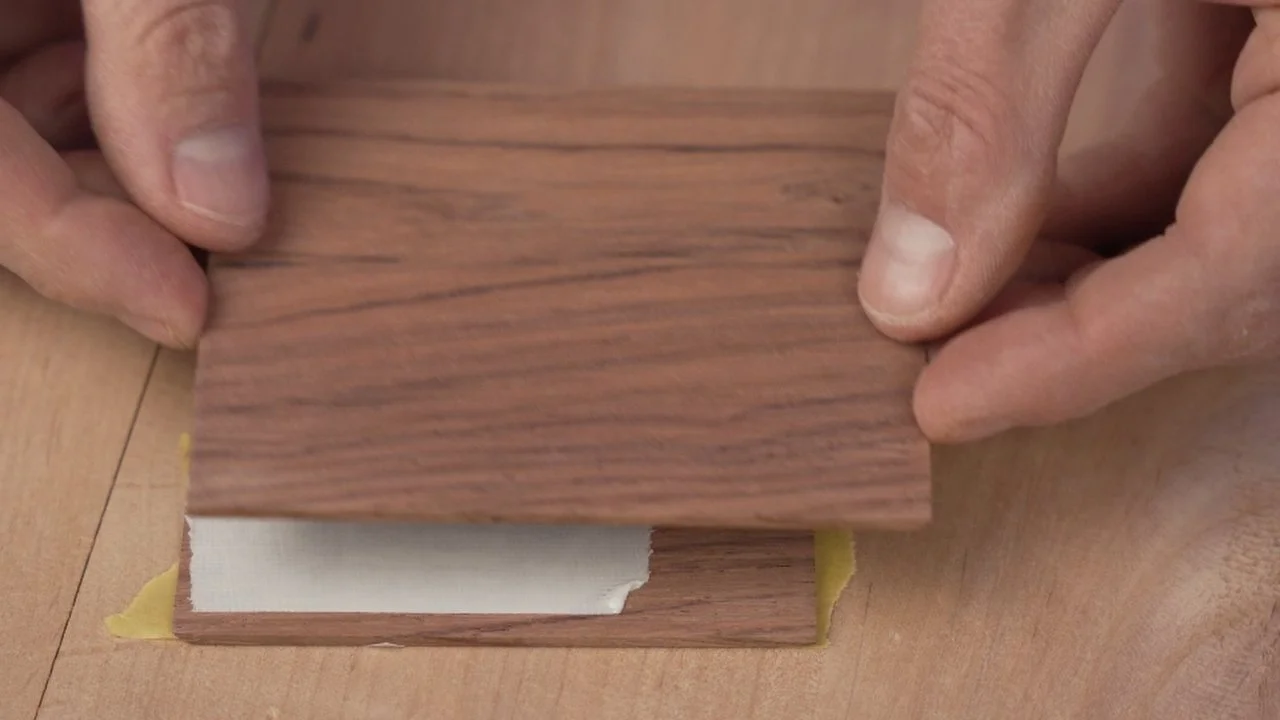
With the tape on the face, use a glue stick or spray adhesive to glue on the cut out template, then use some double-sided tape to stick the two pieces of wood together. Attaching the two pieces together has two main benefits. First, you’ll get perfectly matching shapes when you cut them out at the same time, which will make you look a little bit more professional, and second you do less work because you only have to cut once.


Simple Tools
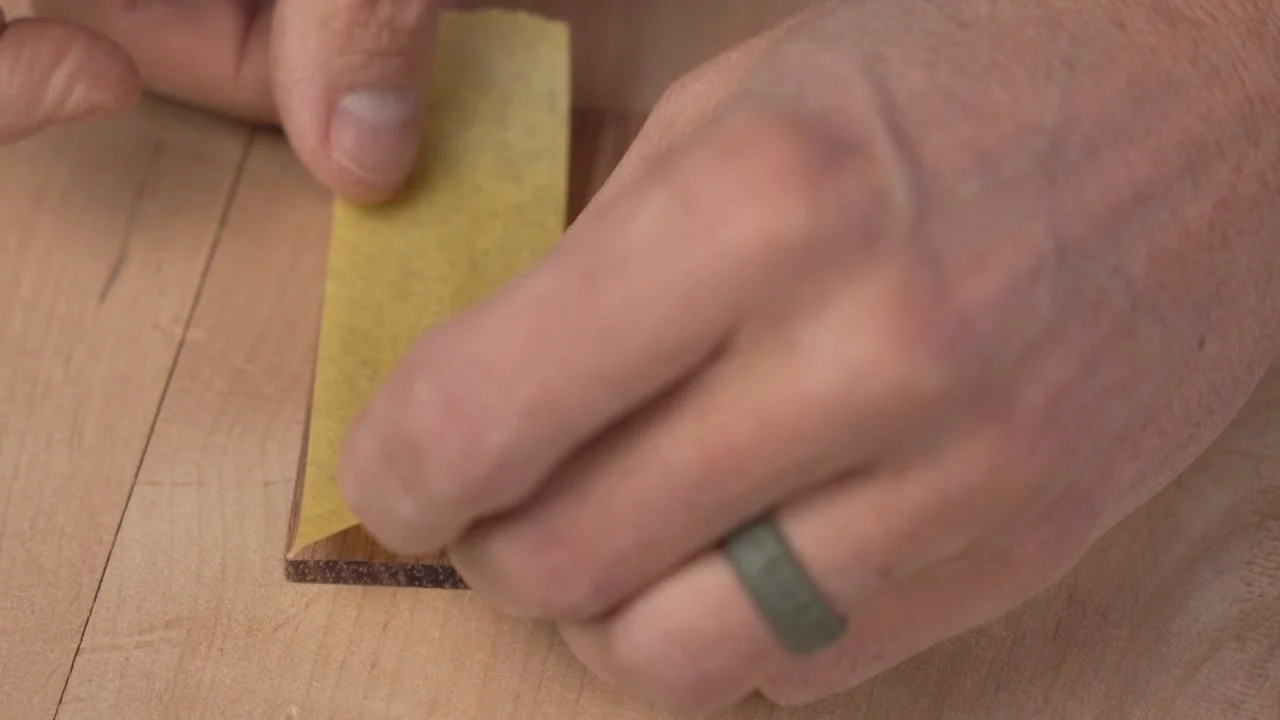
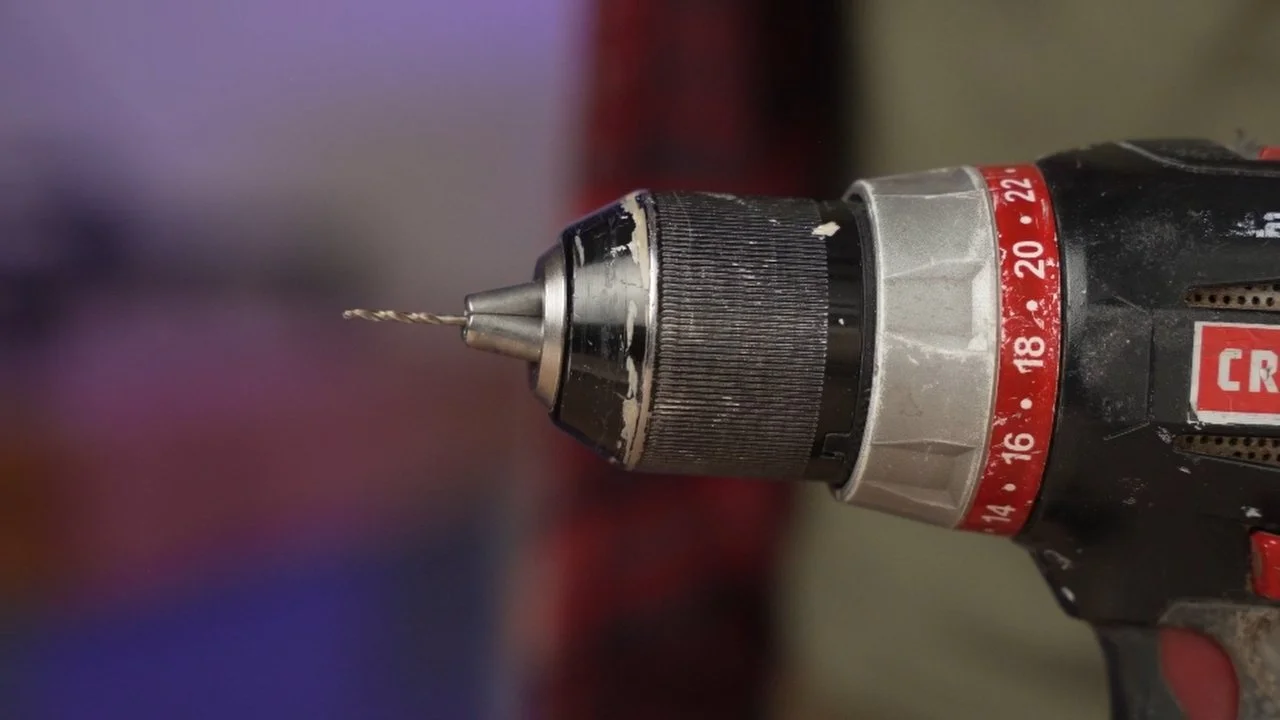
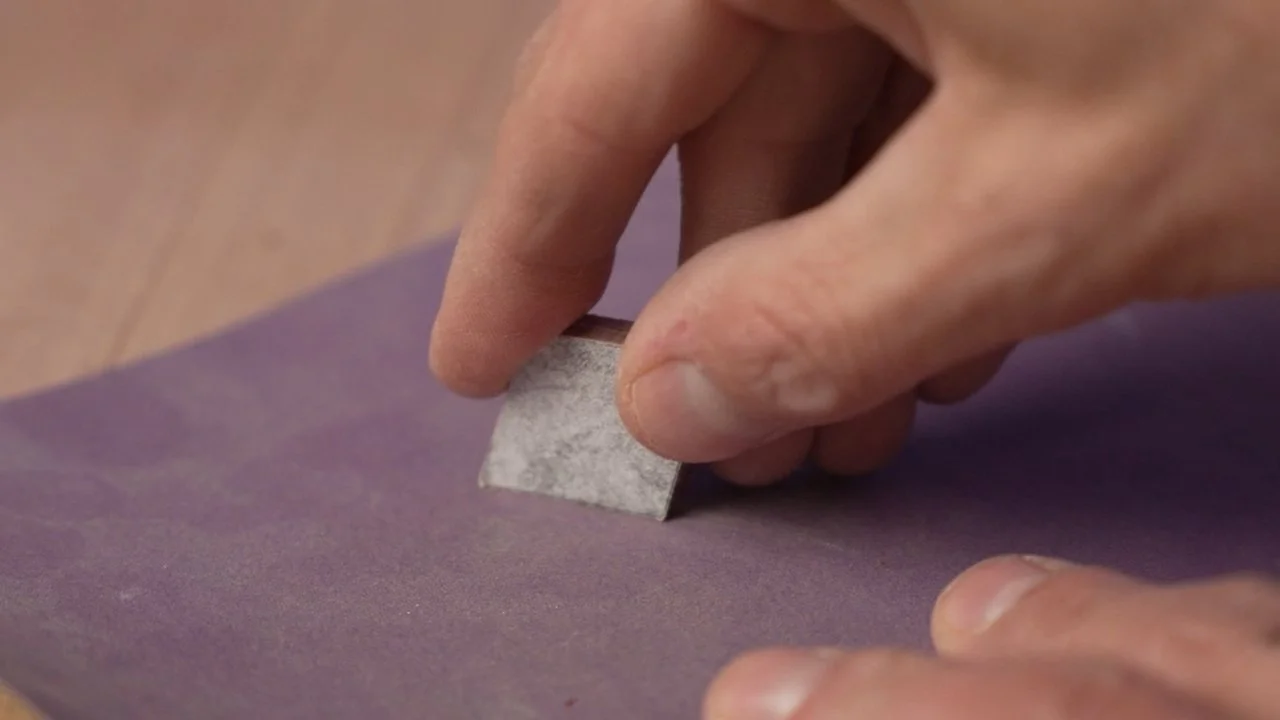
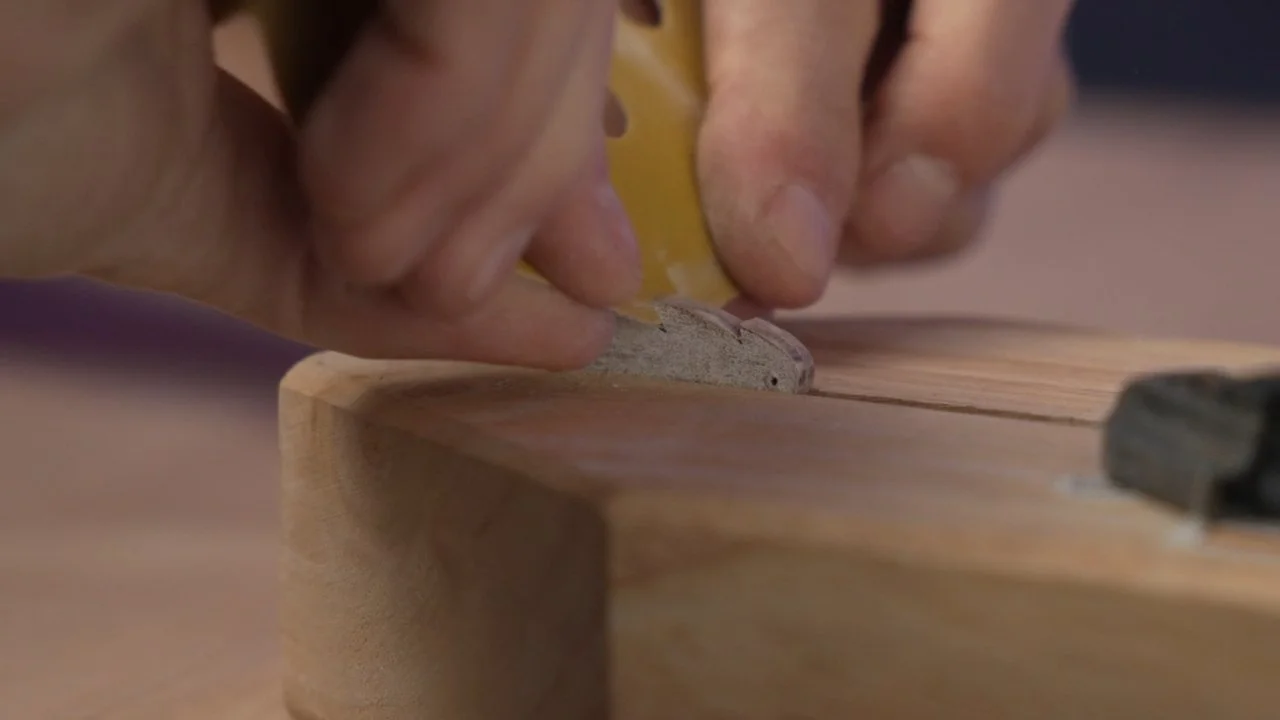
All you need for the first pair is a drill, a saw, and some sandpaper. Start by drilling out the hole for the hardware first. It's much easier to do it now before you cut away the bulk of the wood, making it less likely to break. A 1/16th inch drill bit works great. Use your hand saw to cut as close to the template line as you can. It is better to stay a bit outside of the lines though, because the next step is to clean up the shape through sanding. If you have a mechanical sander this is a lot easier, but good old fashioned sandpaper will do the job. After the rough standing, and further finer sanding to refine the corners, then the Frog tape on the face can be pulled right off. If you have a little bit of trouble separating the two pieces, you can use a razor blade to help pry them apart. A light sanding will take any residue left on there right off. Finish up with a bit more sanding just to round over the edges and make everything really nice and smooth.


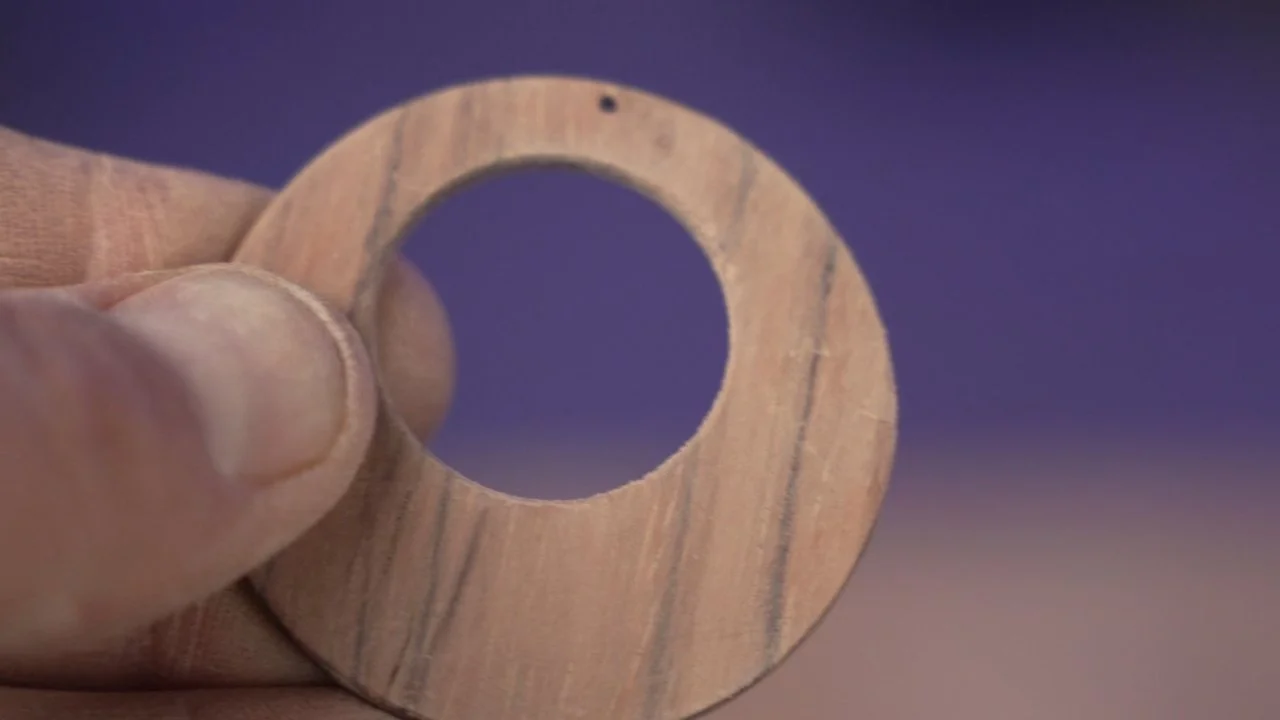
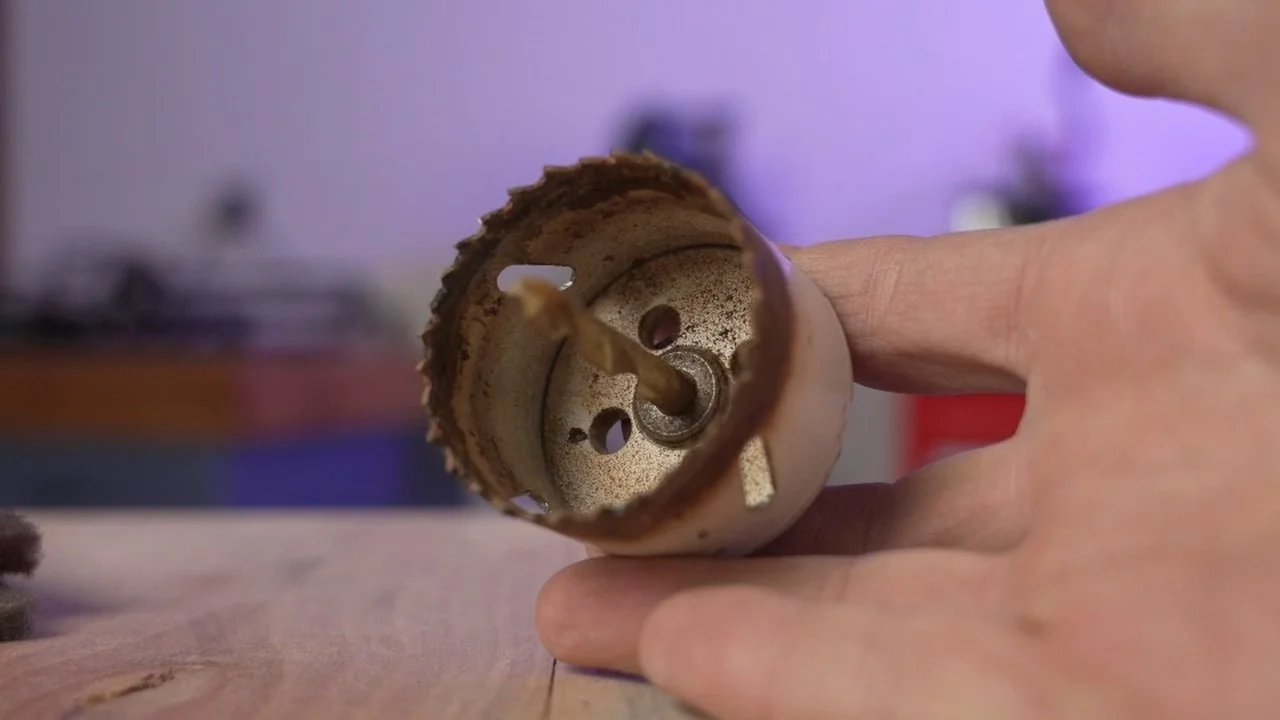
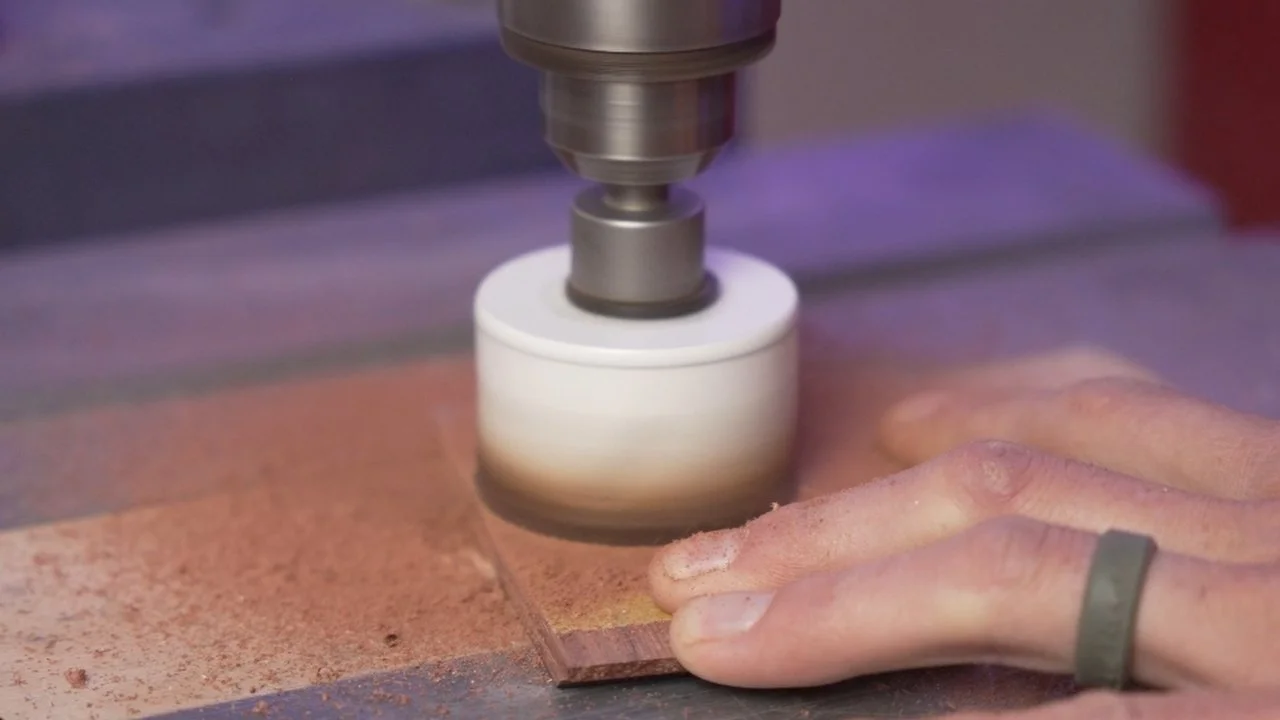
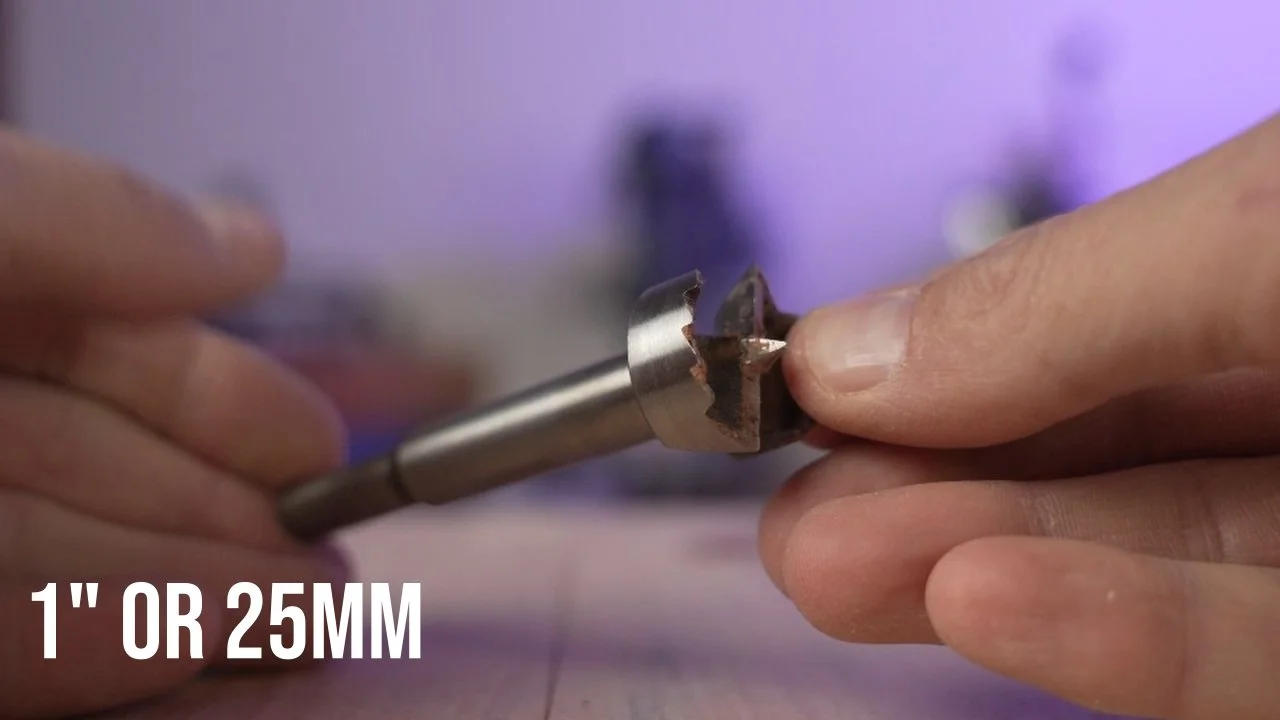
I made one more pair of earrings using basic woodworking tools. For this circular design, the primary tool needed was a drill or drill press. I started again by drilling the hole for the hook. I then used a hole saw to cut out the large hole and a 1-inch drill bit (in my case a 1-inch forstner bit) to drill out the center hole. Holding the circles in parallel clamps was super helpful in getting the center hole out. One tip for keeping your bit in place is to use a punch to put some holes where the cross hairs are in the template before you start drilling. This got sanded up just like the first pair.


Curves
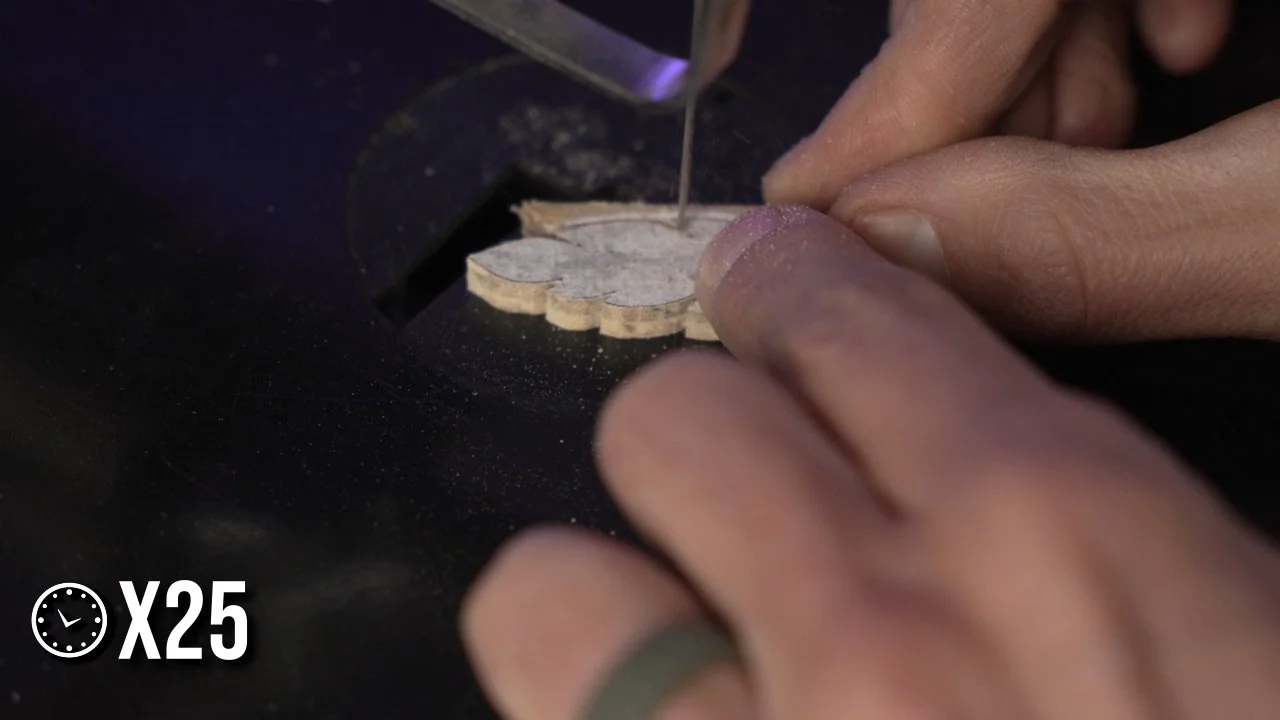
These next two set of earrings have a lot more curves and undercuts which work great with a scroll saw. If you don't have a scroll saw you can certainly do this with a coping saw, but the scroll saw will make it faster and for me at at least also easier. These two tools are great because you can do really intricate designs not just on the outside of earrings, but you can also feed it through the center and do intricate designs on the inside. I prepared the material just like before, but you want to make sure to remember to drill your hole for the hook before you start cutting the shape out. You don't want to cut around all of the outline in one go, but come in on the sides cutting up towards the inner sharp point then back out the blade and then come back in cutting. This will keep points nice and sharp like on the feather. Once you have those cut out you can clean up around the edges.
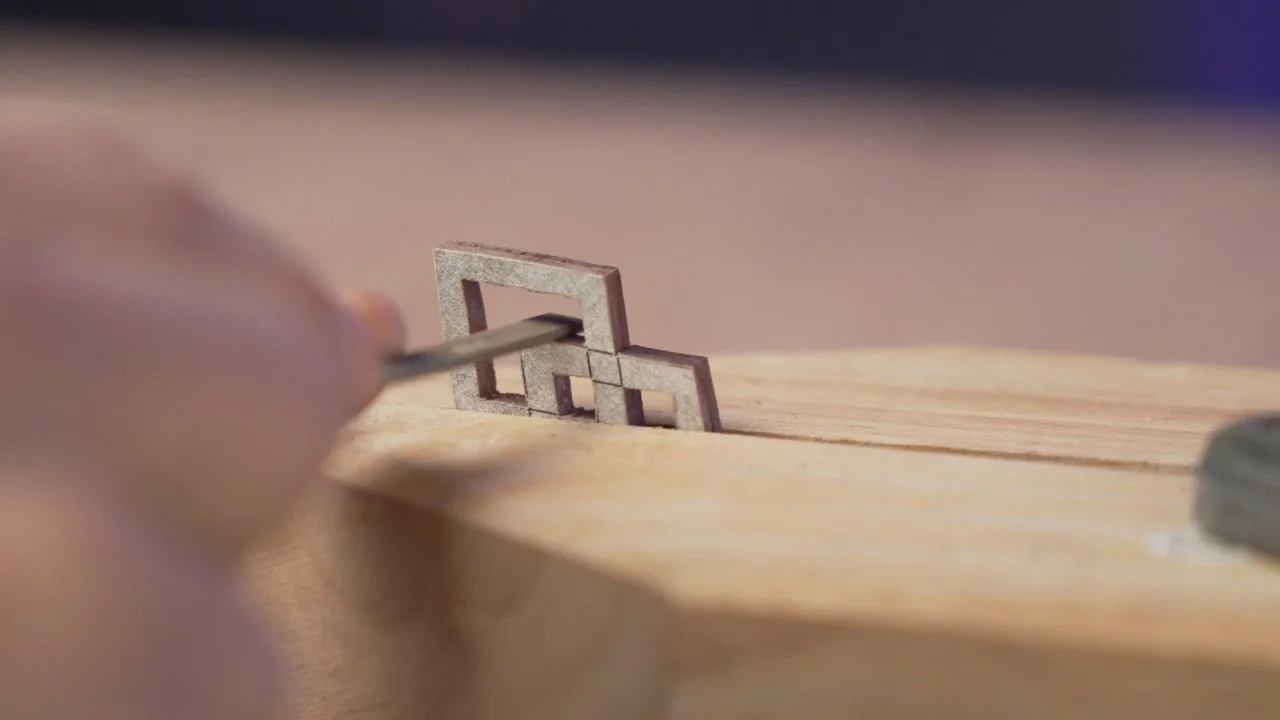
For the double diamond get an 1/8 inch or 3 millimeter drill bit and drill a hole into all three of the center portions so you will be able to feed your blade in. Most scroll saw blades fit in a 1/8 inch or 3mm hole, but you do want to check your blade in case it's a little bit bigger. Now if scroll sawing isn't your forte and the edges are a bit jagged you can still clean these up. Fine files work great because they will not round things over and have sharp edges. If you clamp them into the parallel clamps or another clamp you can put those files on the inside and clean them up. For the sharp undercuts on the outside I recommend a little bit thicker sandpaper like off a random orbit sander. Then everything gets pulled apart and hand sanded smooth everywhere.


Lasers
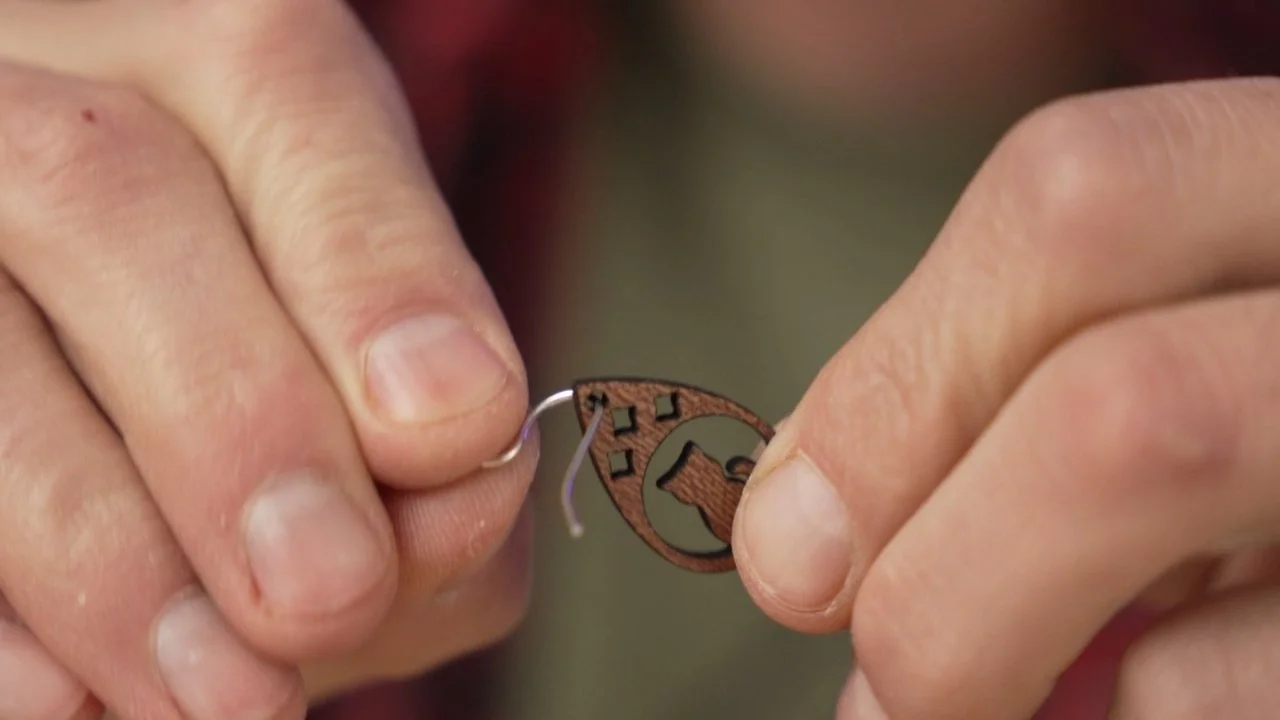
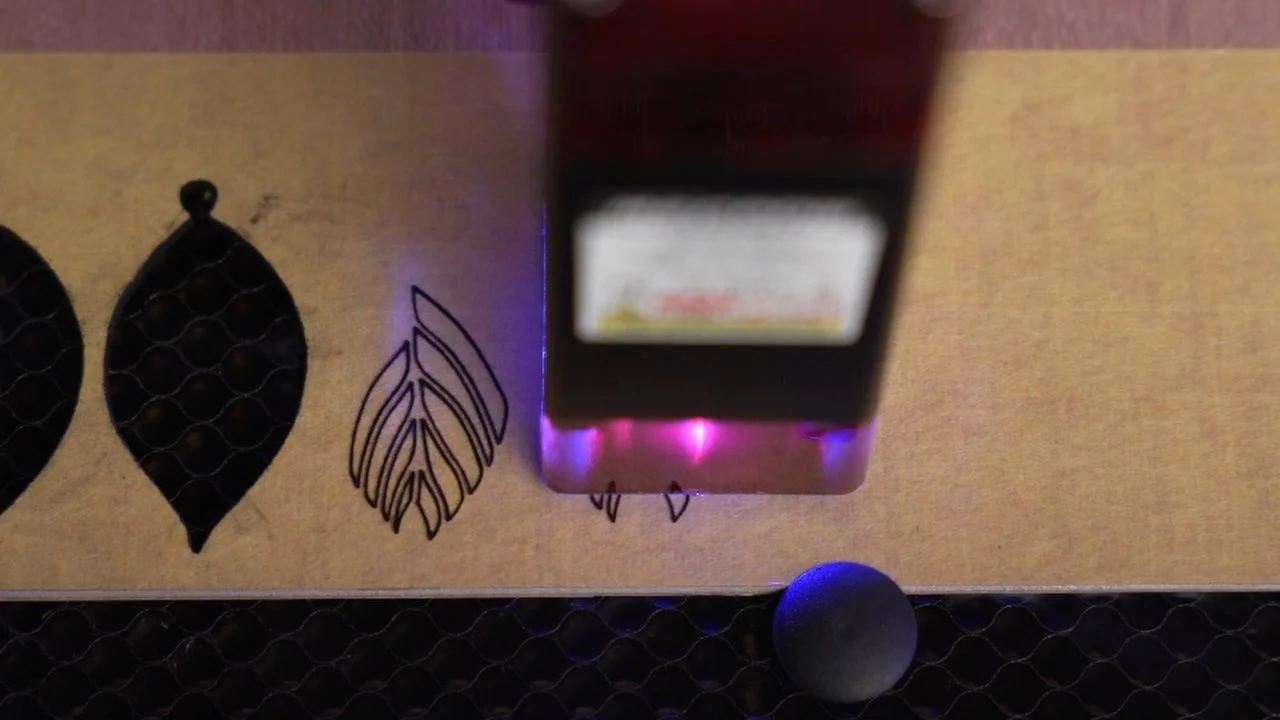
I've had a design in my mind for a while that I've wanted to try but it is too intricate for normal woodworking tools, or at least my skills with them. This is where a laser engraver can cut really intricate shapes. My idea was that I wanted to take a photo of a leaf and then trace it out getting all the little veins, a really airy and open earring. I also wanted it to have a hand-drawn look so I traced a leaf and put the picture into some software called Lightburn that controls the laser. Since it is really delicate on the veins I will use plywood and I recommend sanding the whole sheet before you get started. The laser leaves burn marks on the top and the bottom of the work and since these are so small and delicate I recommend putting tape on the top and the bottom. I tried this with blue painters tape, and green frog tape and they both broke the earing. Frog tape yellow for delicate surfaces was the only one I tried that worked. If you have a 10 watt laser diode the setting in Lightburn I used were 200 millimeters a second for the cut speed at a hundred percent power. Your settings may vary but that may be a good starting point. Once the laser is done I like to use a toothpick to get the earing out of the plywood. After removing the tape maybe a light touch with 400 grit sandpaper just to get off that little bit of smoke that may have gotten on the edges is a good idea. When my son saw what the laser could do he thought it was really awesome so he went and designed up some cat earrings with a little cat in front of a moon and a little bit of stars. I thought this was pretty cool since he's not really into woodworking but was still able to make his idea come to life.


Finish and Hardware
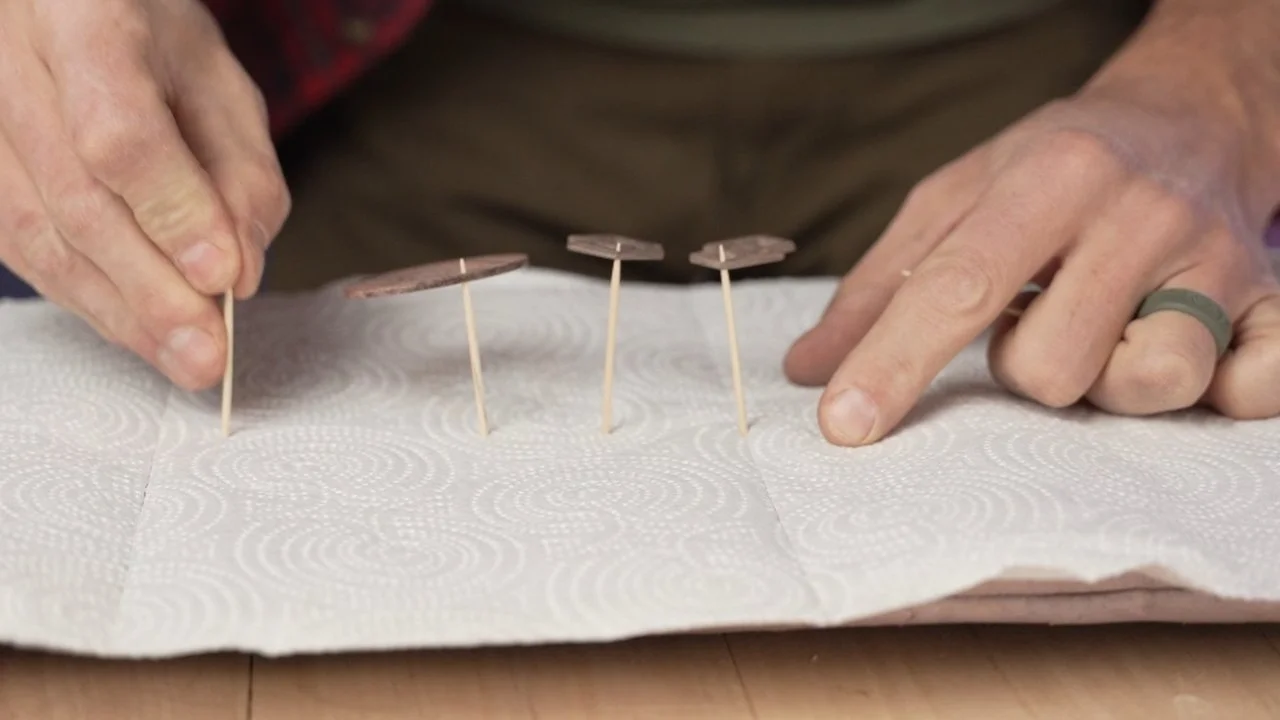
Finishing these can be really easy and I recommend using a spray finish like shellac or lacquer. I like shellac because it is natural but lacquer also works really well also. For holding your earrings I recommend putting the hole on top of a toothpick and then you can just stab these into a piece of foam. With the earrings elevated it is easy to spray, let them sit 30 min then flip them over and spray again.
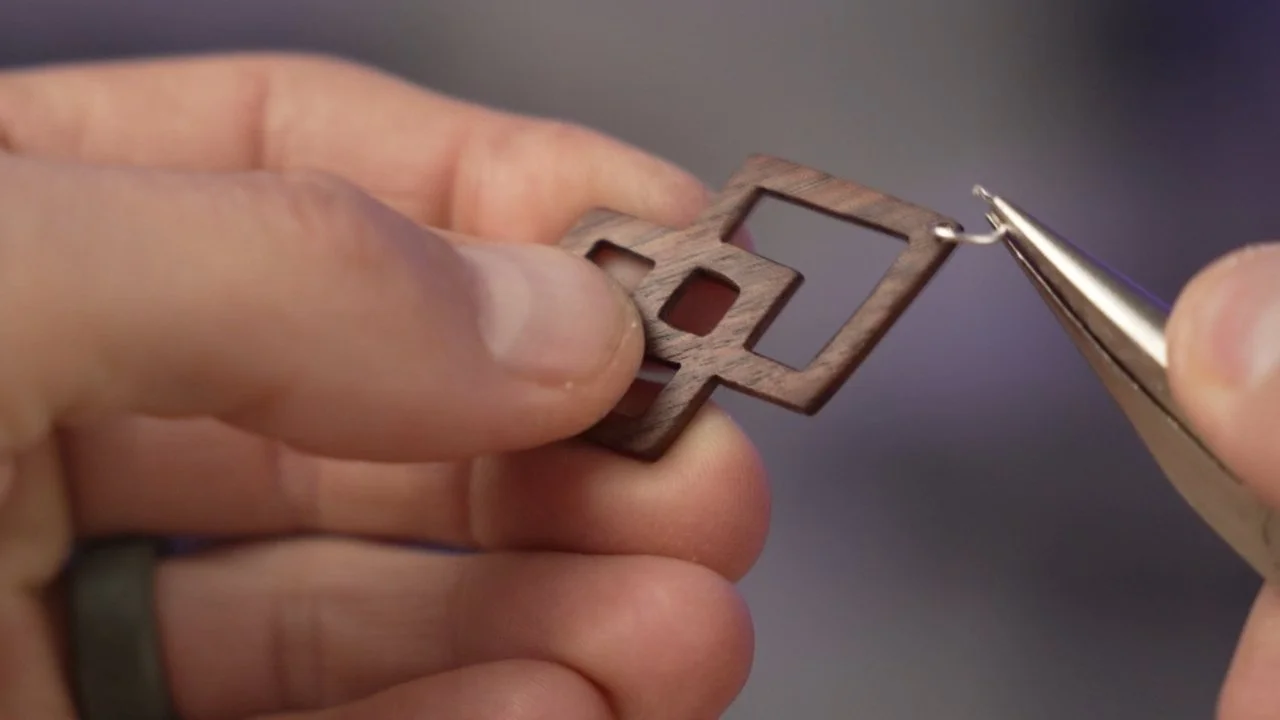
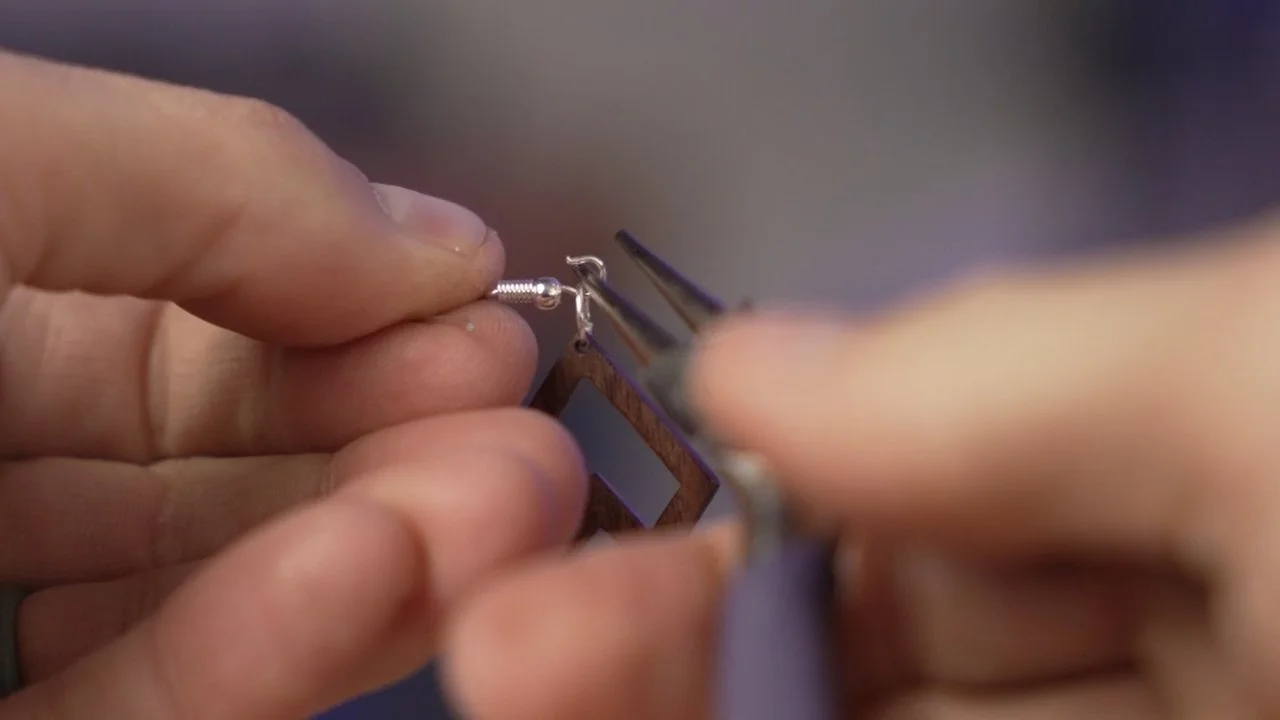
Once the finish is dry you're ready for hardware. I really like sterling silver because I think it looks good with the wood. You can add a jump ring in there if you want it to hang down a little bit more and be a little bit more Dangly, or you can attach it straight to the earring hook. Using some pliers that do not have teeth will help to not mar the silver. If you don't like the way that they are facing you can bend the bottom of the hook to change the way that they face. You’re finnished!